How to Install riyo.ai in Webflow

Start riyo.ai-ing in Webflow by copying the code
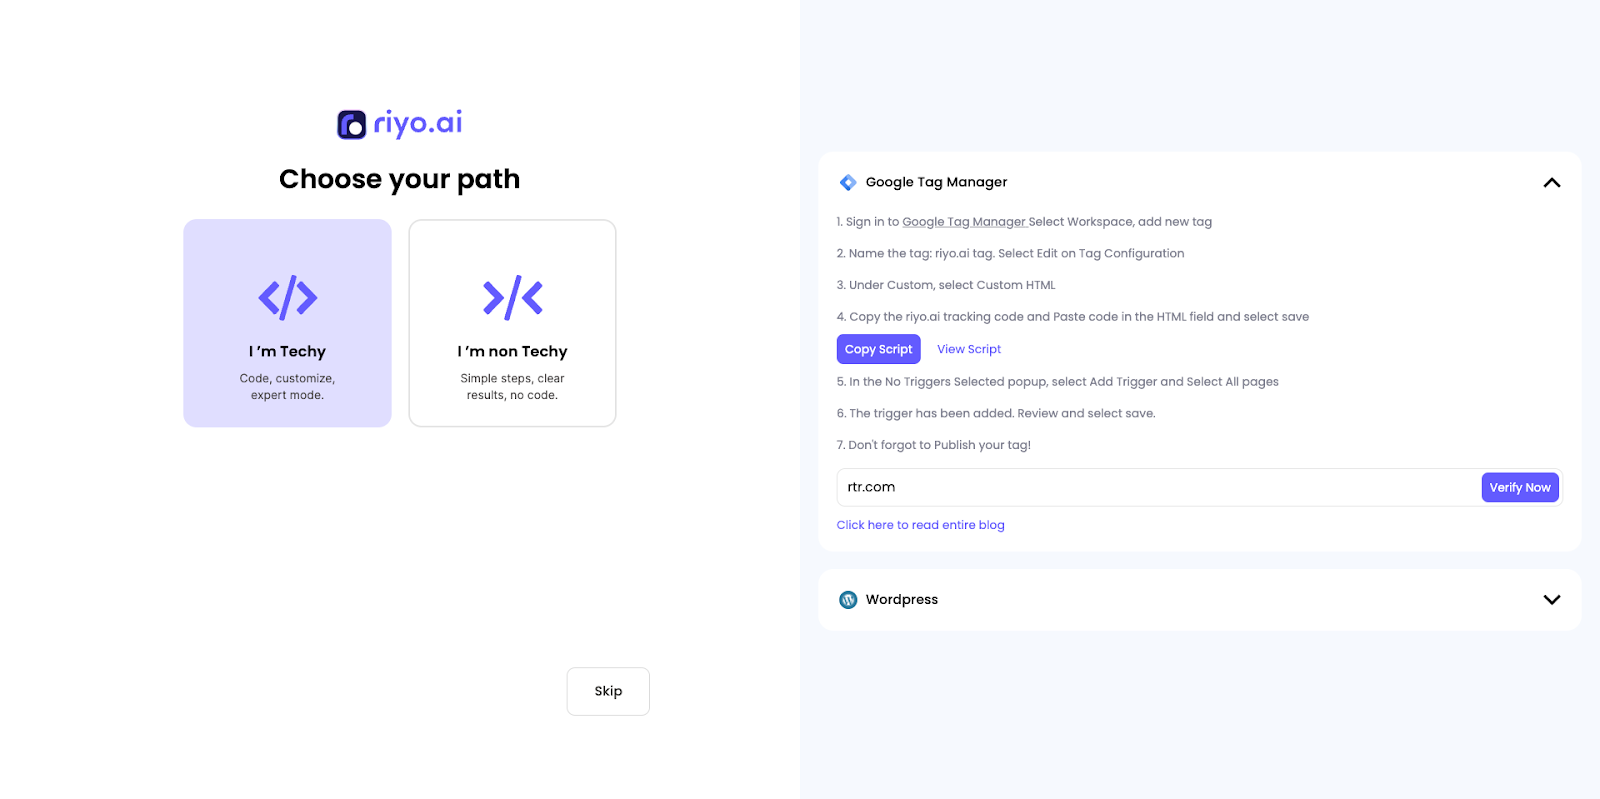
The first step is to obtain a script you can post on your website's backend. While completing your signup, you will be asked to enter your website URL.
Note: If you are already using riyo.ai with an existing website (property), please add a new property from the top right side of your dashboard.
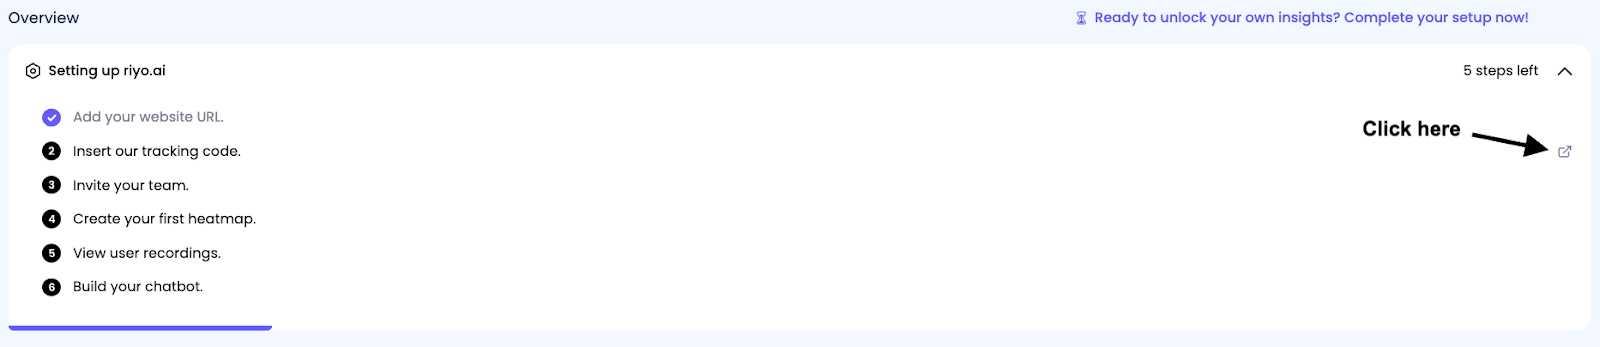
Step 1: Click on the icon highlighted below in the Install tracking code section of the overview section to access riyo.ai’s tracking script.
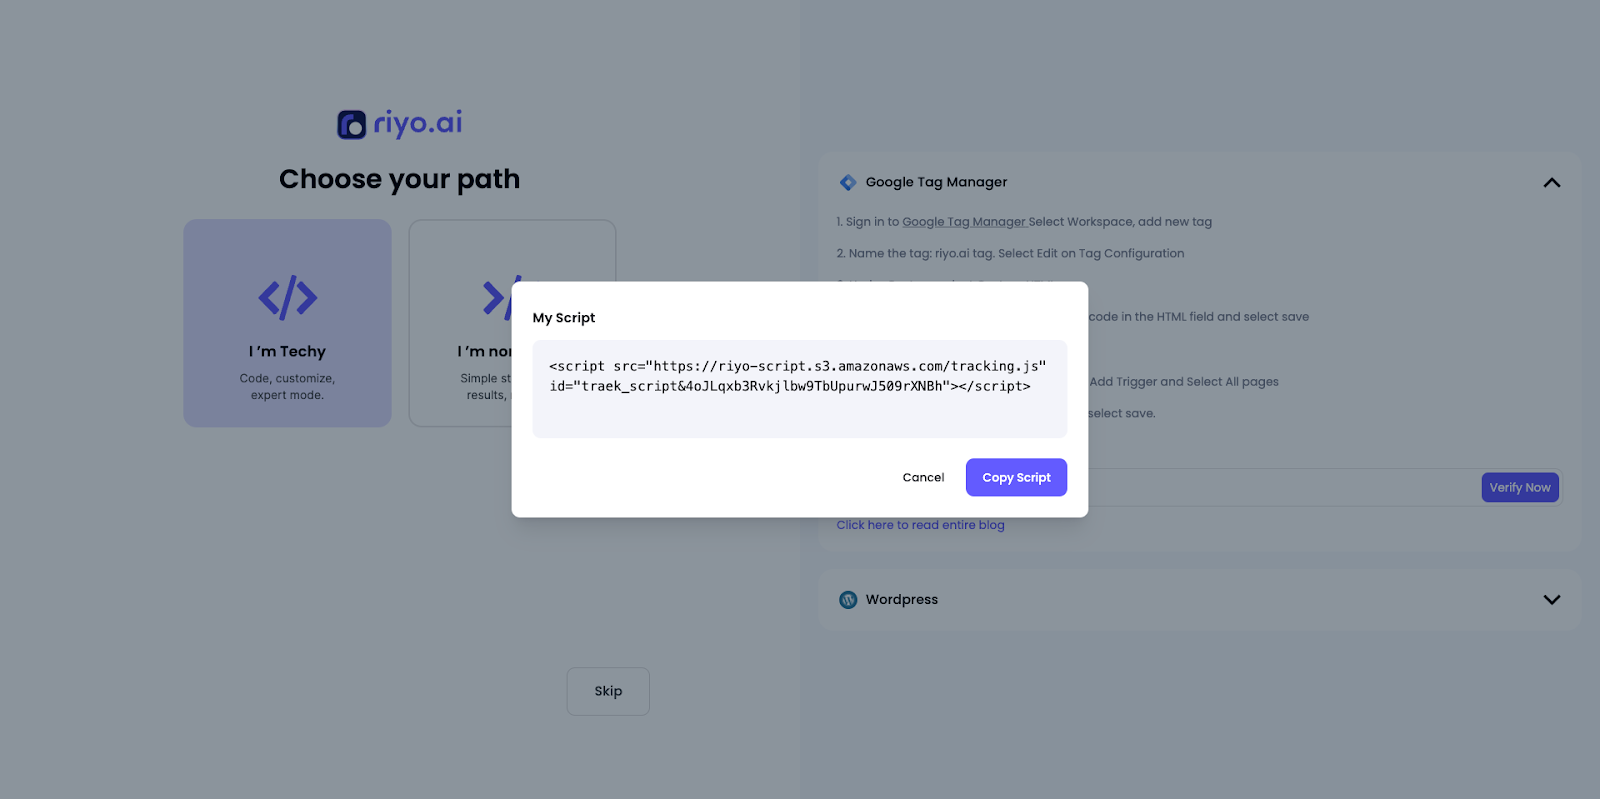
Step 2: Click View Script and copy it, or you can copy it by clicking “Copy Script.”
Login To Your Webflow Dashboard And Continue With The Following Steps
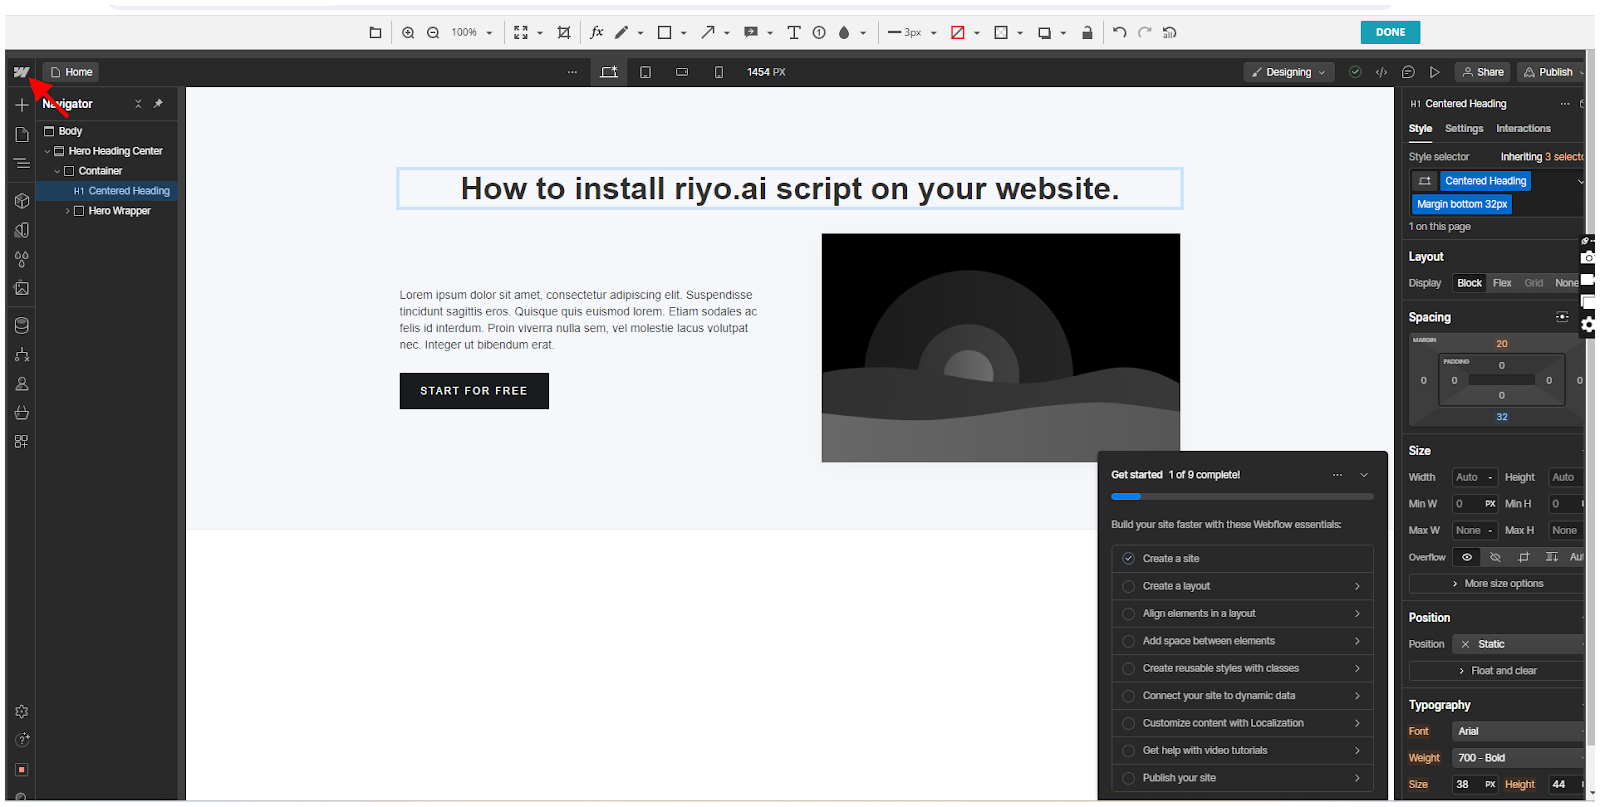
Step 1: Click on the Webflow icon in the top left of your Webflow dashboard.
Step 2: Select the code editor
Slide 3: Add the riyo.ai script
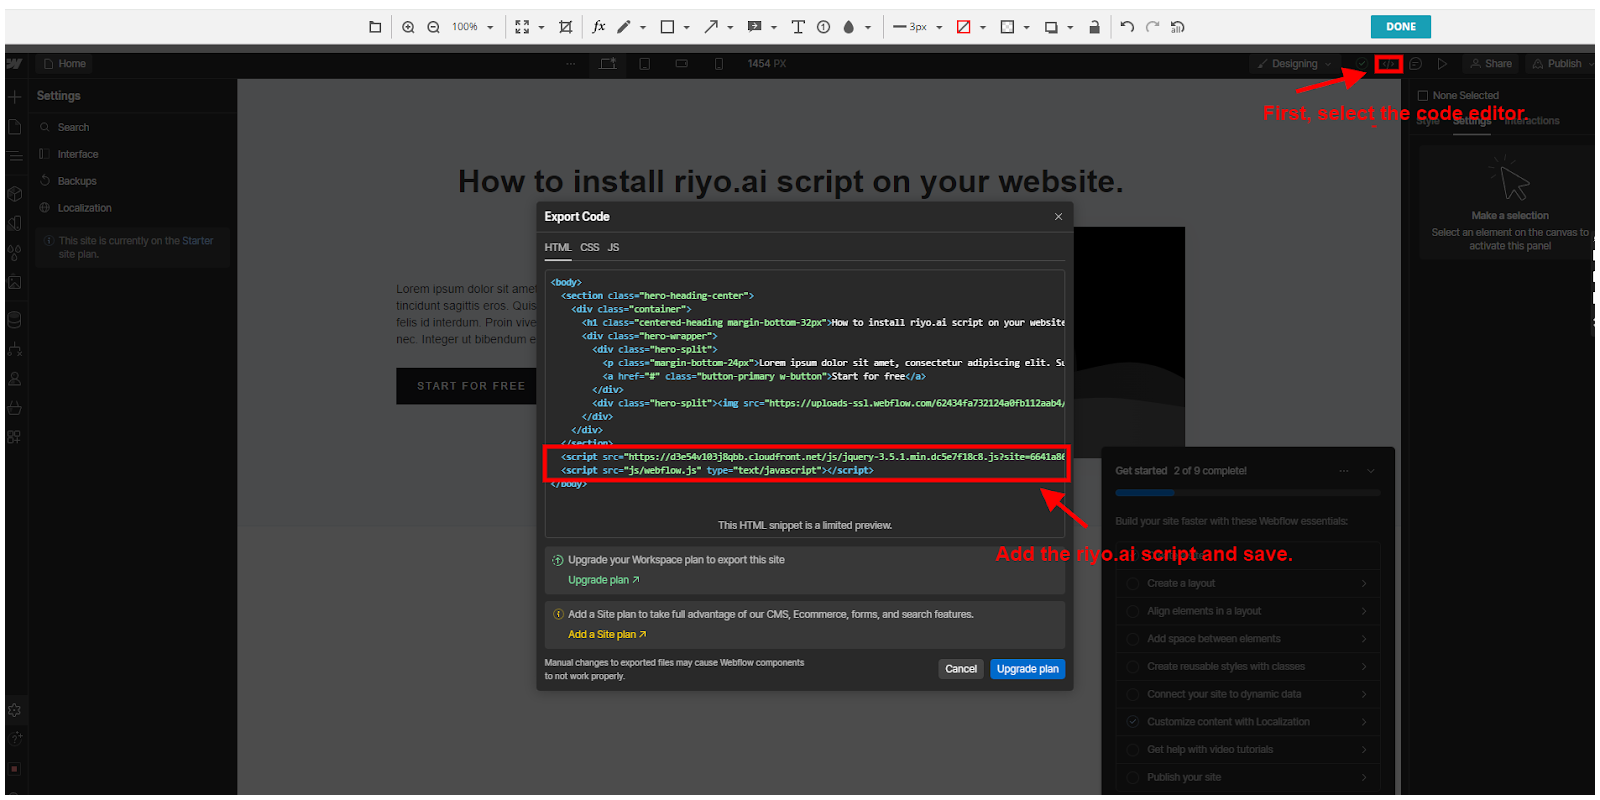
Slide 4: Click Save Changes.
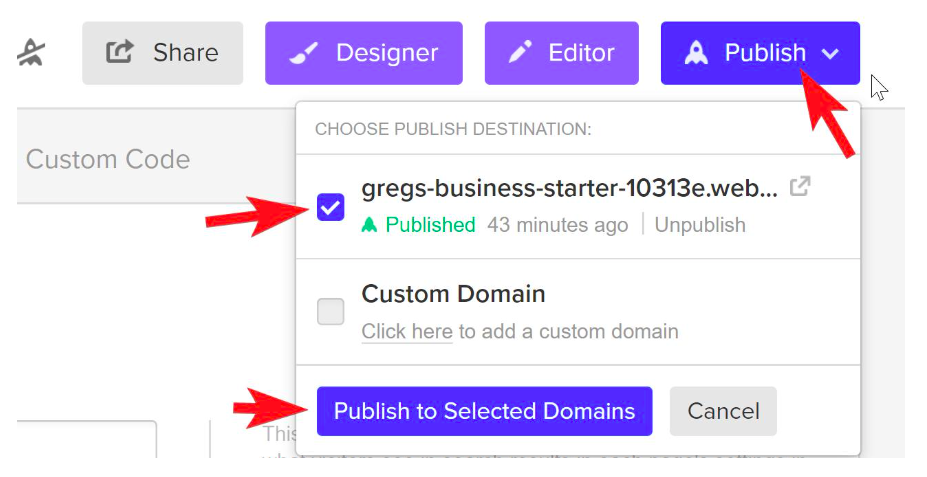
Slide 5: Click Publish on your project settings page.
When asked to select a domain, you should choose the top-level domain for the Site listed in riyo.ai.
Slide 6: Click Publish to Selected Domains.
Slide 7: Verify installation within the riyo.ai Dashboard.
Let's make it simple; check the following video to understand the steps easily.


Krunal Shah- CTO
Having worked on numerous challenging projects in the fields of social businesses, the automotive sector, and education, Krunal has over 10 years of expertise in the IT industry.
Get riyo.ai
riyo.ai is easy to set up, easy to understand. Track visitor behavior, understand their identity, and close deals instantly with riyo.ai.
Get Update
Get timely updates on new features, offers, packages, and specially curated companies generation tips and tricks directly sent to your inbox.